Before I start in on today’s project, I wanted to mention that I recently had the privilege of being interviewed as this month’s Member in Focus for Pattern Review. I talk about my early days of sewing, and boiled down a description of my personal style into just 8 words. You can read the article on their blog, here.
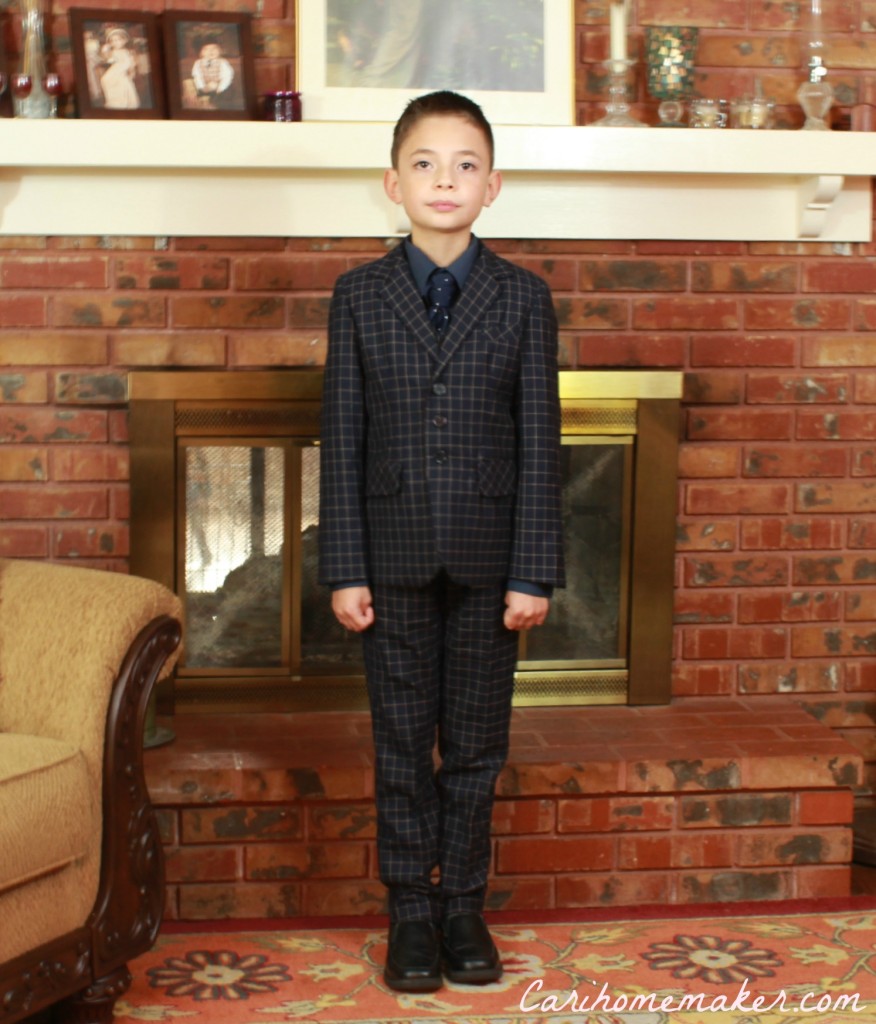
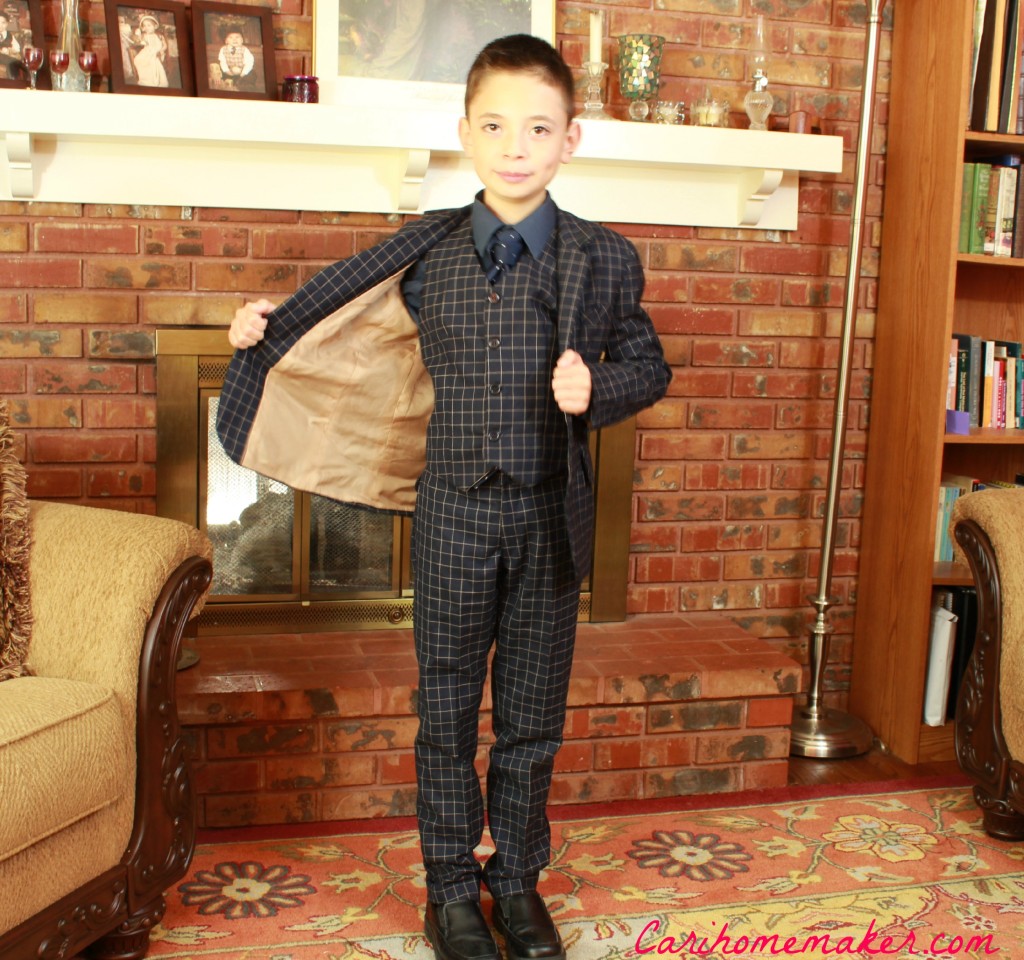
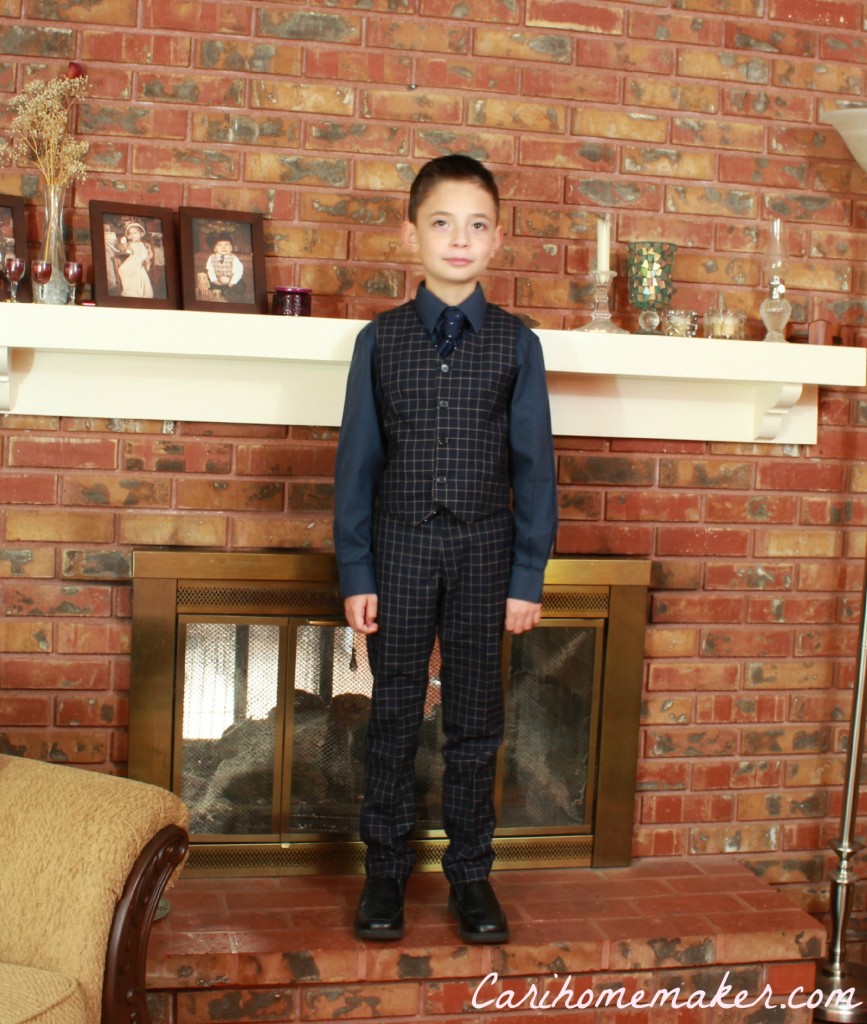
The project I’m featuring today was way, way overdue for completion when I finally finished it up about a week or so ago. Romeo’s needed a new suit for a few months now. To fill his wardrobe gap, I gave him a few options of various suitings from my stash. Of course he picked the most difficult one to work with, a windowpane pattern in navy and yellow. I will admit, the fabric choice did increase my procastination levels. There’s so many places to have to pattern match in a suit that it makes it a lot of brain work to use plaids. It’s done now and it is the real deal. A three piece wool suit, lined in rayon bemberg.
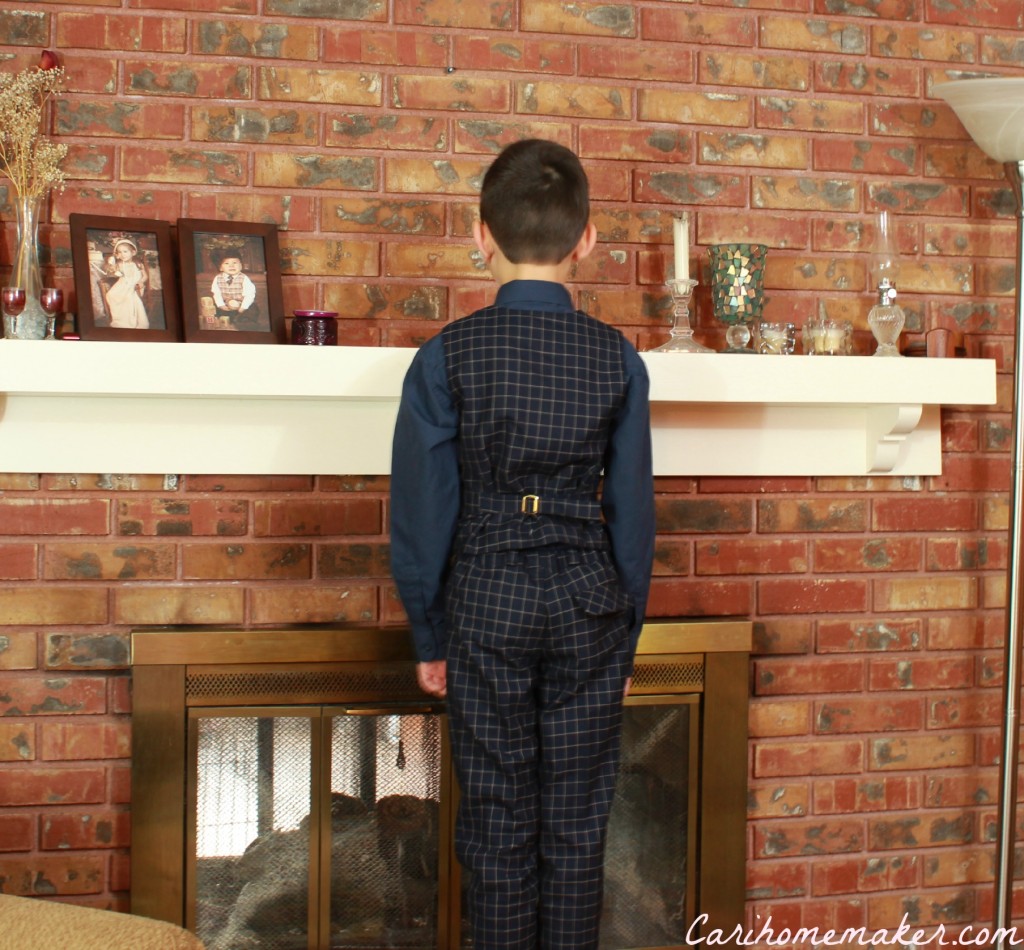
The pattern is Burda 9433. I’d never used this one before, but since Romeo is now a 134cm size, it seemed like a good time to transition to a larger size pattern, even though I could have still gone up a size with the pattern I’d been using for him, Burda 9781, which is now out of print. The newer pattern is very much on the slim-cut side. Romeo is built along some pretty slender lines, and this suit fits his proportions nicely. Despite the slim cut, I did have to add elastic along the back of the waistband to snug it up to his waist. This is something I need to do pretty much each time I make trousers for him regardless of which pattern company I’m using a pattern from. I put a standard vest buckle on the vest and he keeps it pulled in snug.
I’ve never understood the practice of making the back of a men’s vest all out of lining. The suit jacket is already slippery from it’s lining, so it makes no sense that the outside of the back of the vest would also need to be slippery. I like to make vest outers completely out of the fashion fabric; it’s sturdier and looks better when the jacket comes off.
I left the front pocket-like flaps off the vest, but put the jacket and trousers pockets in as shown on the pattern. As you may have noticed, I went with bias cutting for the pocket flaps so I wouldn’t have to match the pattern in those areas. I tried really hard to line up the stripes both vertically and horizontally for the rest of the suit. I was mostly successful, but a few spots are off. Those unmatched spots drive me crazy, but I hope the overall effect of “hey there’s an 11 year-old with a pretty sharp suit” overcomes the small imperfections that are present.
Suits are never really quick projects, but this one went together about as smoothly as it could. I like the mod look of the slim cut pattern design. I think I’ll be making this one quite a few times more, in this size for now, and in the next few sizes as Romeo grows.
Romeo tied his own tie today. This is the Trinity knot, not a mistake. It could have been adjusted a bit tighter, but he’s a tween who tied his own tie, so he’s allowed a little bit of slack.
This was made up in stash fabric.
Stash-busting stats: 16 Projects this year. 43 1/2 yards.
Romeo was not impressed by my new indoor photo lighting set up, even though I was having fun trying it out. I tried to get him to loosen up a bit while taking pics. I gave him my phone and started giving him scenarios about who he was talking to or what was being said. I got some great reactions out of him.



Leave a Reply